httpv://www.youtube.com/watch?v=DcKdmY9rA5o
Holidays bring out both our creative sides, as well as a bit of our crazy side. Of course, nothing quite brings out both of those traits like holiday decorating. As a geek, I love to use technology to get the most out of things, which in this case can only mean one thing: A computer-controlled holiday light show. (Naturally)
I am currently in the process of setting up this year’s Halloween light show, with a front yard “graveyard” as the back drop. To setup your own light show, regardless of holiday, you’ll need some components to add to your digital decorations.

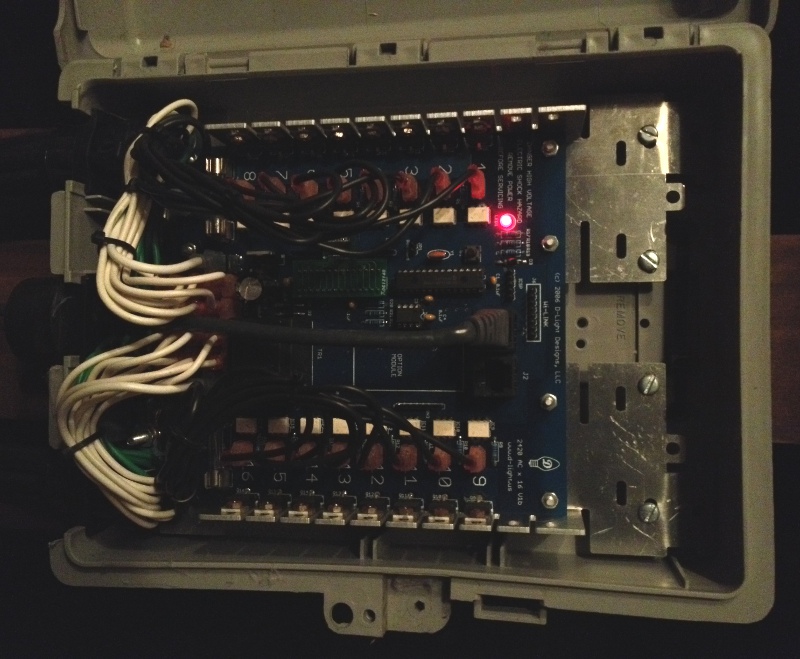
The first item on your light show shopping list will be a light controller. These boxes are the heart of the show. You can find a number of different build-it-yourself kits and as well as pre-made controllers from different manufacturers, such as Light-O-Rama or D-Light.
One nice thing about most of these controllers is that you can mix and match different controller brands, as most will support a common set of light show standards. In my case, I went with a D-Light ACx16 controller, which allows me to setup up to 16 different “channels”, each of which can control one set of lights.
The light controller’s purpose is to take a pre-programmed sequence of instructions on when to send electricity to the various lighting decorations around your display. They can control how much electricity is sent, which allows the creation of dimming or shimmering effects, and with the right setup of lights, even animation. The controllers can even be used to control other electrical devices, from actuators to move animated figures or other items like fog machines.
When the instructions sent to the box match up with music that’s played at the same time, you get the holiday lightshow many of us are familiar with. For that, most consumer-grade controllers will need a PC of some sort. If the light controller is the heart of the show, the PC is the brain.
The requirements for a PC to be used with a light show are not very high, but it will help your stress levels when setting up your own show if you make sure yours meets (or exceeds) the specifications required by the controller hardware and software.
For most setups, this means a Windows XP, Vista or Windows 7 PC, with a processor that’s clocked at 1.5GHz or faster, and has 1 GB of RAM. Many home setups can made due with an old, hand-me-down PC that’s been cleaned up and put into service as a secondary computer.

Of course, being a geek, I didn’t want to just go with an old PC, I wanted to push things on the tech side. That didn’t mean getting the biggest or fastest PC I could find. If anything, since this PC needed to be running constantly, and would need to be placed in a sealed box to protect it from the outdoor elements, I looked for simple and small.
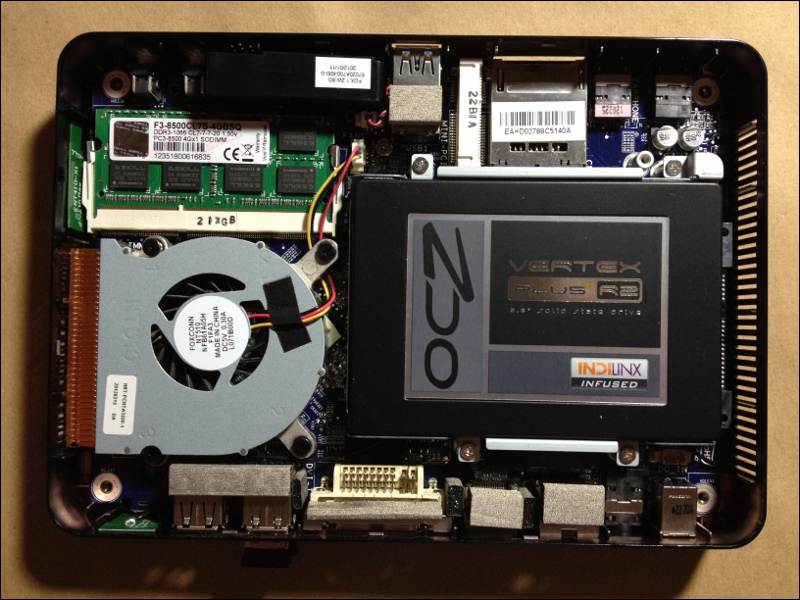
I found my simple and small components in the form of a “nettop”. Nettops are the desktop equivalent to netbooks that many own. I purchased a Foxconn nt-A3700, which is a “barebones nettop” that is roughly the size of hardcover novel and weighs less than a pound. The system is considered “barebones” because it comes with the case, motherboard and processor, but no RAM or hard drive.
One nice thing about nettops like this one is that the AMD E-450 processor uses very little electricity. The system as a whole uses a 65W power supply, which will help when placed in that protective box with other gear. The processor is far from powerful performance-wise, but you could easily use it to surf the Internet and play many reasonably sized multimedia files, which it will do as the brains of the light show.
To complete the computer, I added 4GB of DDR3 system memory. I could have gone with far less, but RAM is one of the cheaper upgrades for a PC, and will help with performance. I also added a relatively inexpensive SSD hard drive.
Solid state hard drives may not be familiar to everyone, but as a new technology, their advantages over traditional hard drives are quickly taking over the laptop market. These drives feature no moving parts, which means they can be made smaller and lighter. That’s a boon for the laptop market, but in my case, I liked the idea of not having to worry about a bump to the protective box causing an issue with a traditional hard drive. SSDs also tend to be faster, which will be helpful in a system with a basic nettop processor that has to process multimedia files for the show.
In Setting Up a Halloween Light Show – Part 2, I’ll cover the light show software setup, as well as how to control a PC in a box on your front lawn remotely with your tablet PC from the comfort of your home.

2 thoughts on “Setting Up a Halloween Light Show – Part 1”